

So, you want to fix your ABC suspension and parts are getting sparse or you can’t find all the correct hoses? Mercedes pretending like your car never even existed and refuses to provide parts? It happens. Thankfully, ABC is not a very complicated system to fix or maintain, just your average hydraulic suspension. No, you should not replace it with cheap coilovers and no, it will not handle as well if you did, and it may even be dangerous.
So, we’re starting a series of articles with info from our mods and workarounds to help the community or whoever else may be interested.
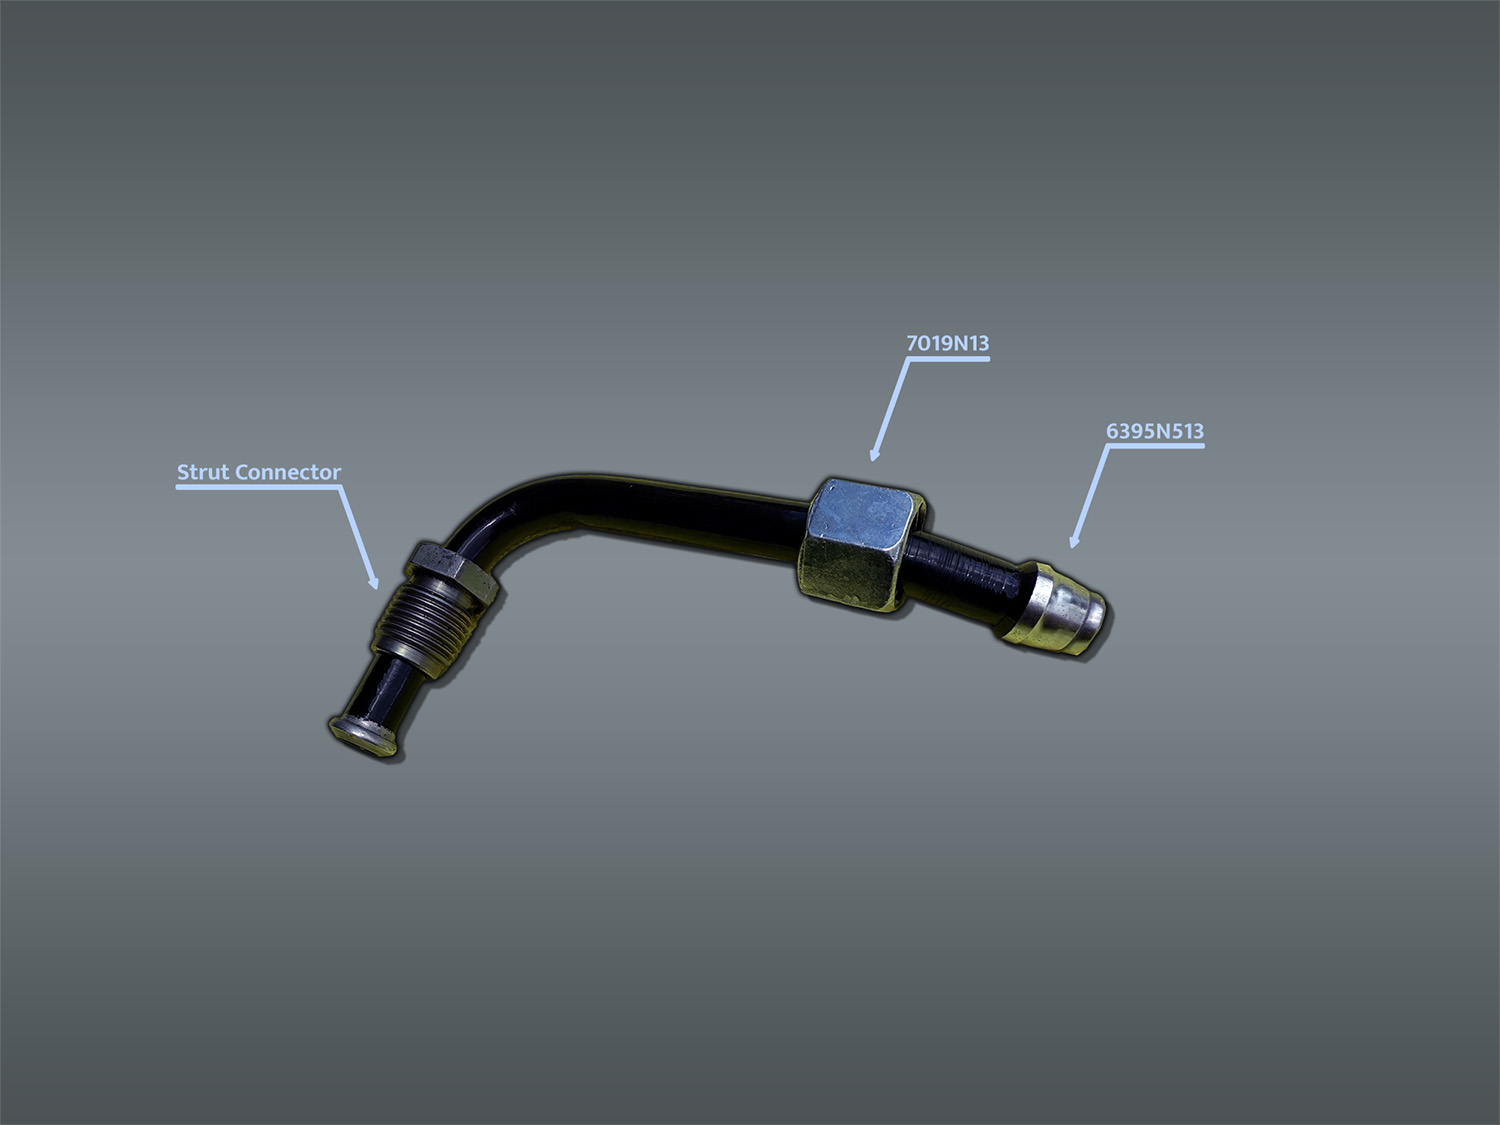
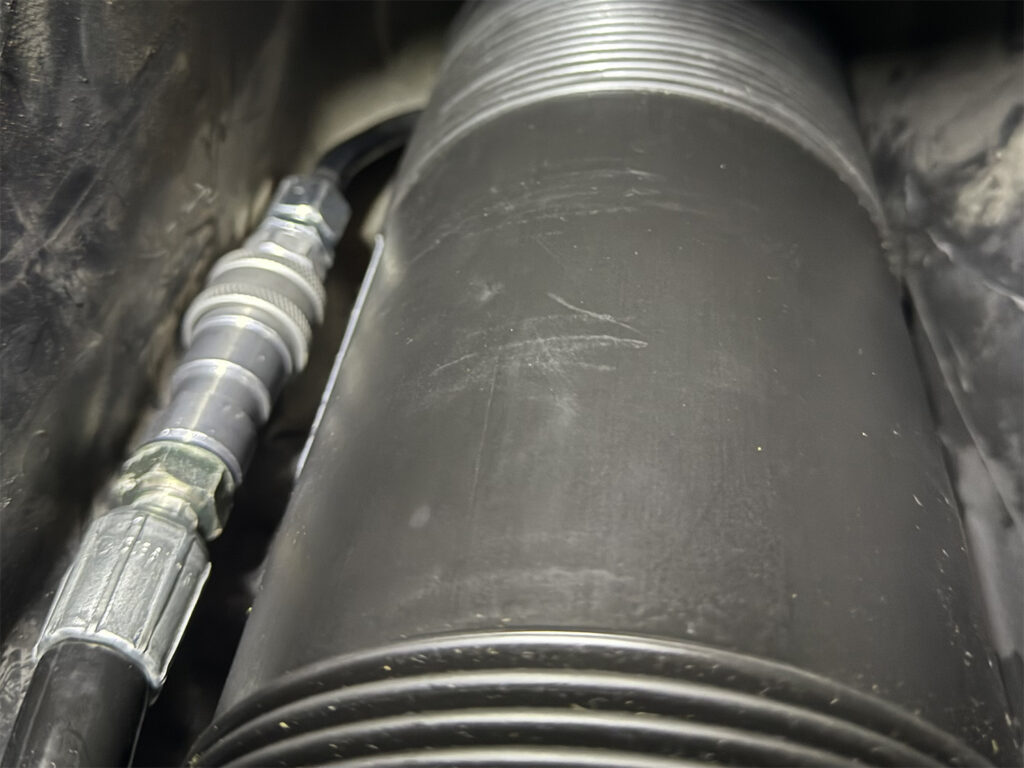
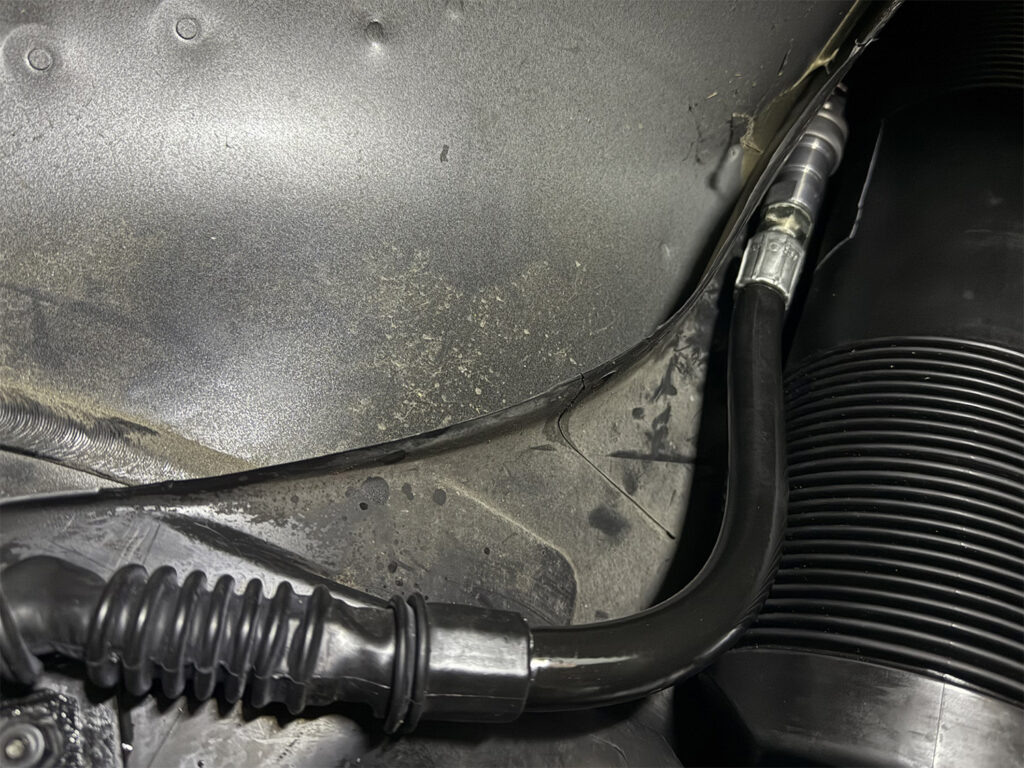
Let’s start with fixing the hose that goes from the rear strut to the hard pipe. This hose is crimped on one end to a hard pipe and crimped on the other end to a quick disconnect fitting. This clearly means that if the hose goes bad, the entire assembly needs to be replaced, which requires you to drop the rear subframe…or does it?
The Existing Setup
Mercedes, in its wisdom, decided to make the system a series of hard pipes in spots, with crimped on rubber hose sections. The decision, as far as we understand, is not only cost related but also functionality related, in order to avoid oscillations and other issues normally associated with hydraulic suspension. Unfortunately, the hose sections are hard to remove, and special tools, knowledge and research are needed to do so (the hydraulic world is vast).
The Plan
Is to make the hose easily removable on both ends, for easier replacement in the future. The plan is to also replace the Mercedes quick connect fittings, which are now obsolete, with something more modern, easily purchased and available.
The Removal
First the old hose needs to be removed. To make it simple, this means that the old crimp needs to be cut off without even so much as scratching the hard line. Our suggestion is that you cut a groove towards the end (hard line side) of the fitting. Make sure you go deep enough until you hit the rubber hose underneath. Do not worry about cutting the hard line, as the rubber is only the outer layer, followed by steel mesh and then another inner rubber layer. Then you should cut a series of grooves along the fitting and remove it in sections. If you do not have access to cut the circular groove, cut the length wise grooves first to release some of the crimp tension. Then turn the hose and crimp as needed, once tension is released.
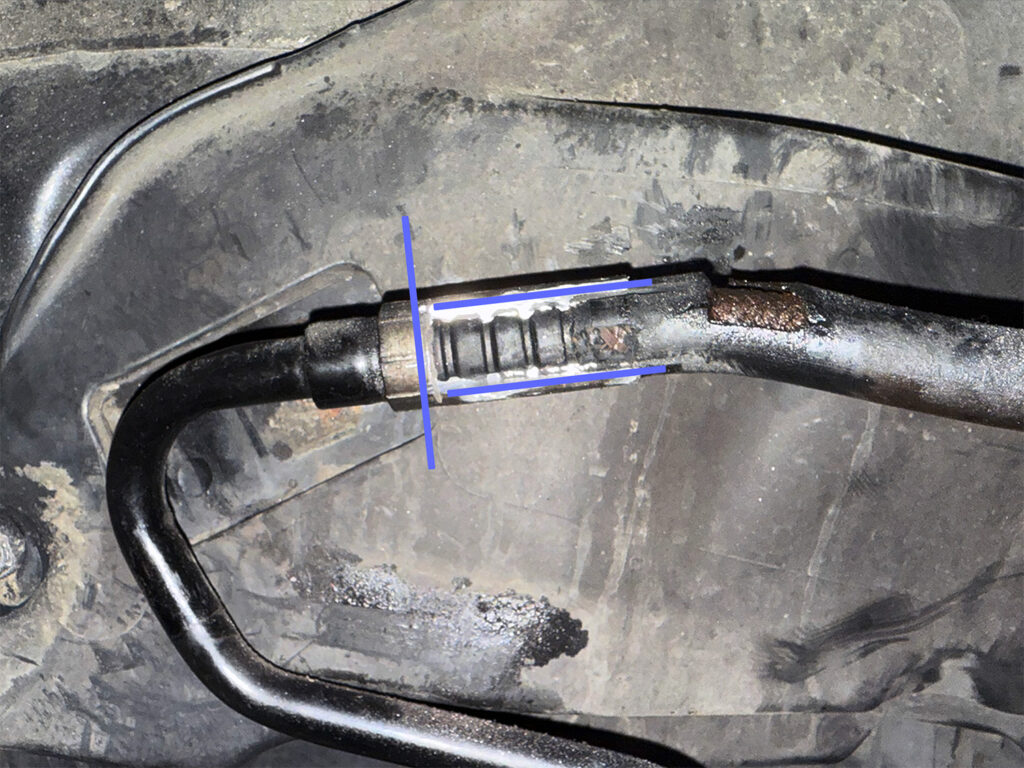
Removing the hose itself can be difficult. You can opt to cut the steel mesh and then remove it or try to muscle it out. Remember you still have an inner rubber layer after the steel mesh before the hardline starts.
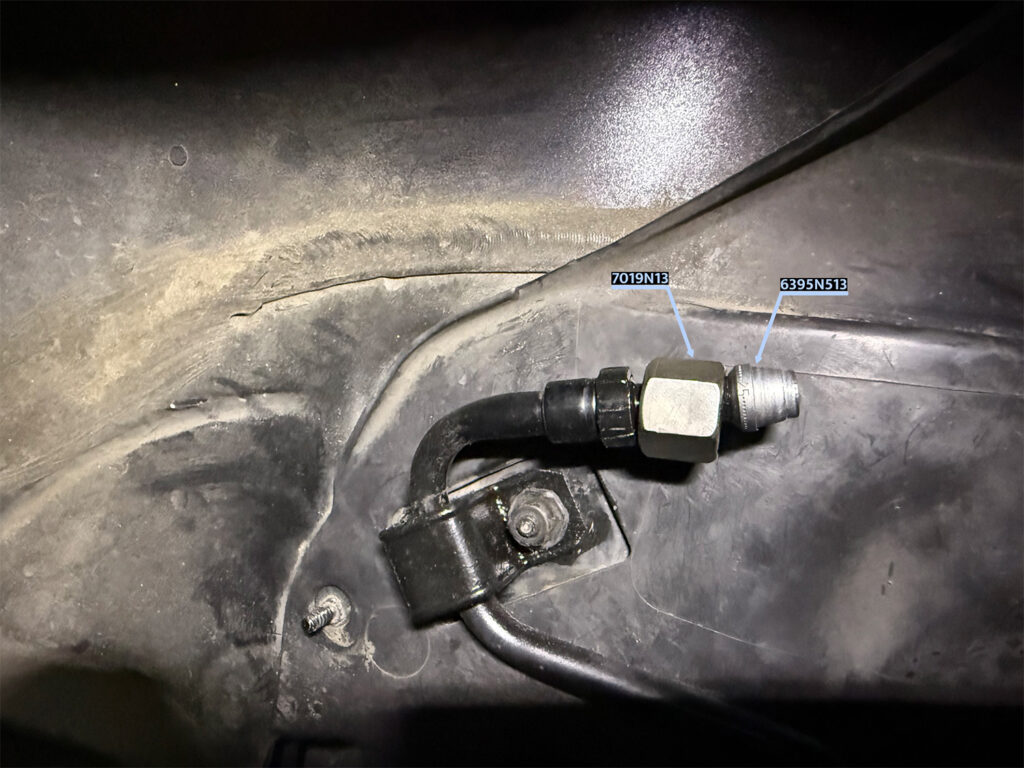
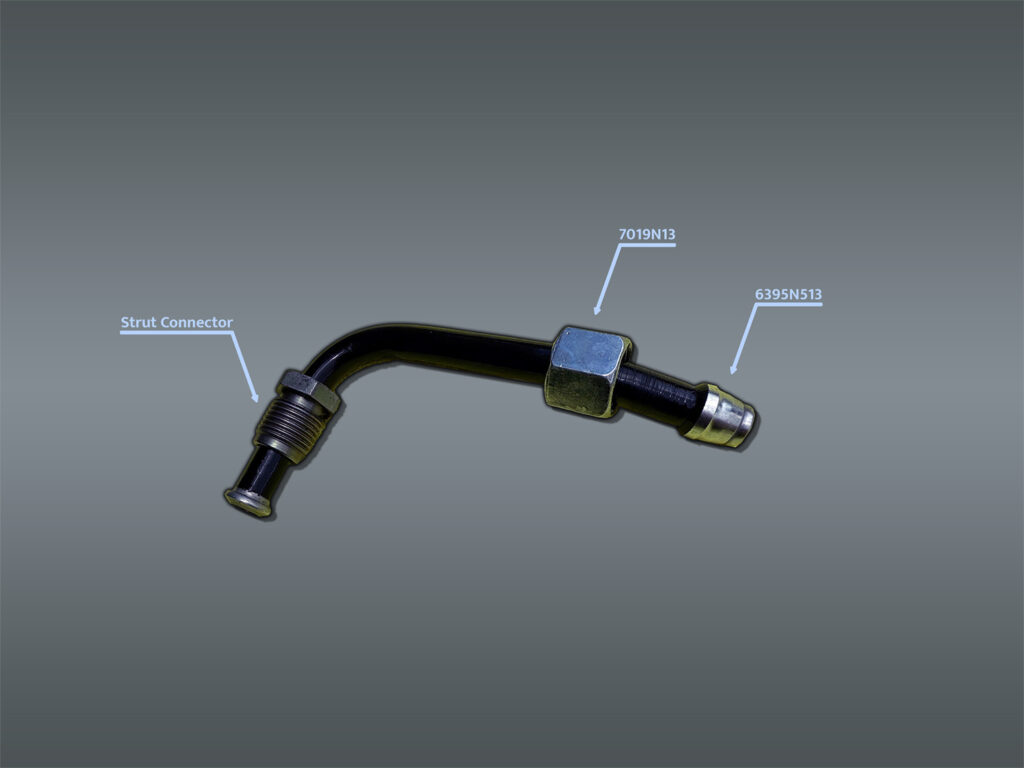
The Hard Line
We need to make our hard line end mountable which means that we need to use a flareless fitting (in hydraulic terms) or grab a flare tool and go to town. We decided to use a flareless fitting. Below are parts for both steel and stainless-steel options. Theoretically, no moisture should get between the fitting and the line, so stainless should not be an issue. However, if moisture does get in, you are better off with steel so you don’t have the stainless steel corrode the steel. We decided to go with stainless steel. You will need one piece each per hose.
| Part | Manufacturer | Use | Threads |
| 7019N13 | McMaster-Carr | Nut | M16x1.5 |
| 6395N513 | McMaster-Carr | Ferrule/Sleeve | |
| 5949K87 | McMaster-Carr | Nut | M16x1.5 |
| 3779N13 | McMaster-Carr | Ferrule/Sleeve |
If you take a look at the hard line you will notice the end is tapered so it’s not 10mm throughout. Some parts are smaller. You have 2 choices here. Either cut some of the taper off and get the ferrule/sleeve to bite on the 10mm piece or hope the minimal size difference won’t matter. We tried both methods and both seemed to work just as well. Our suggestion is to cut the end off.
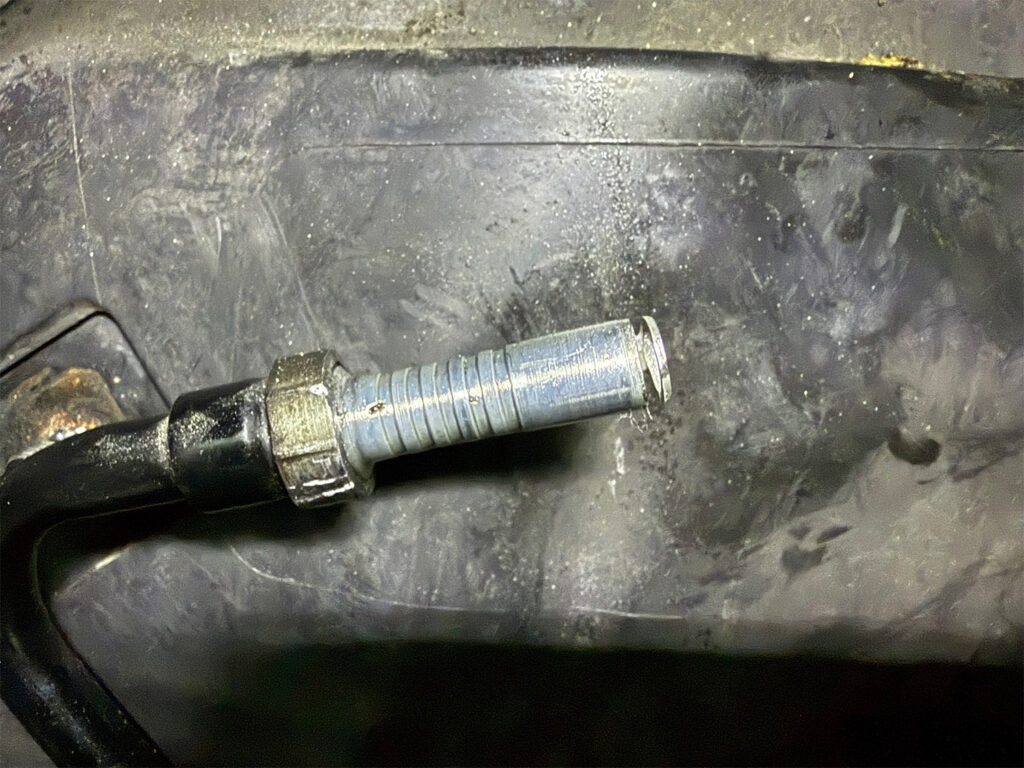
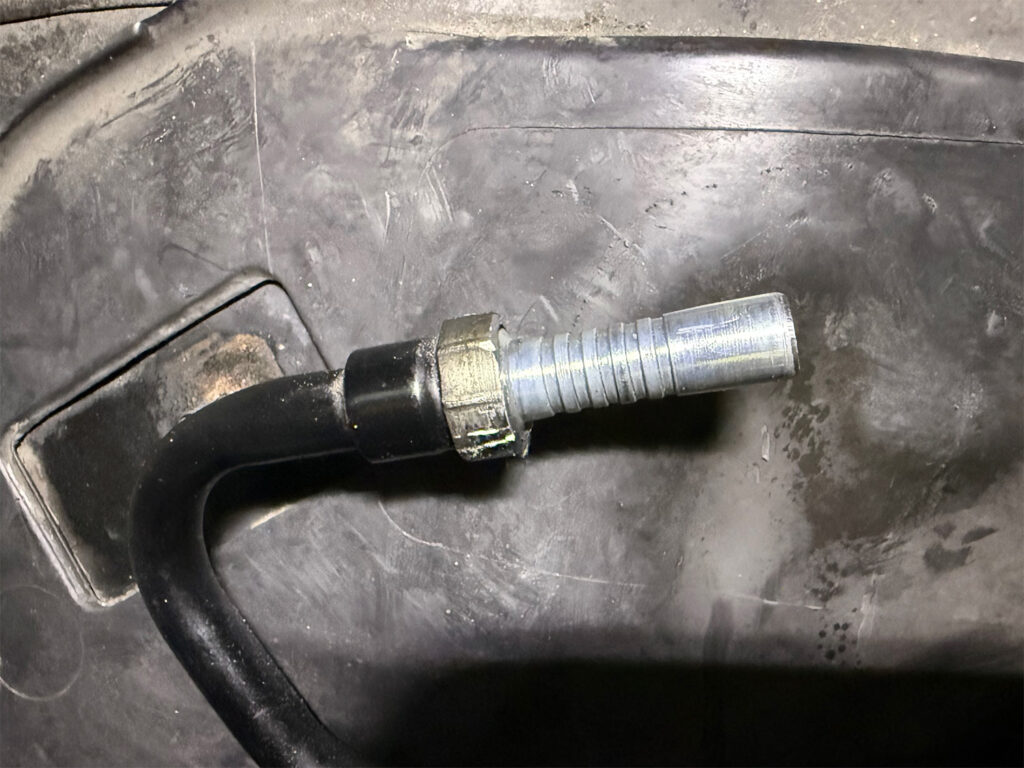
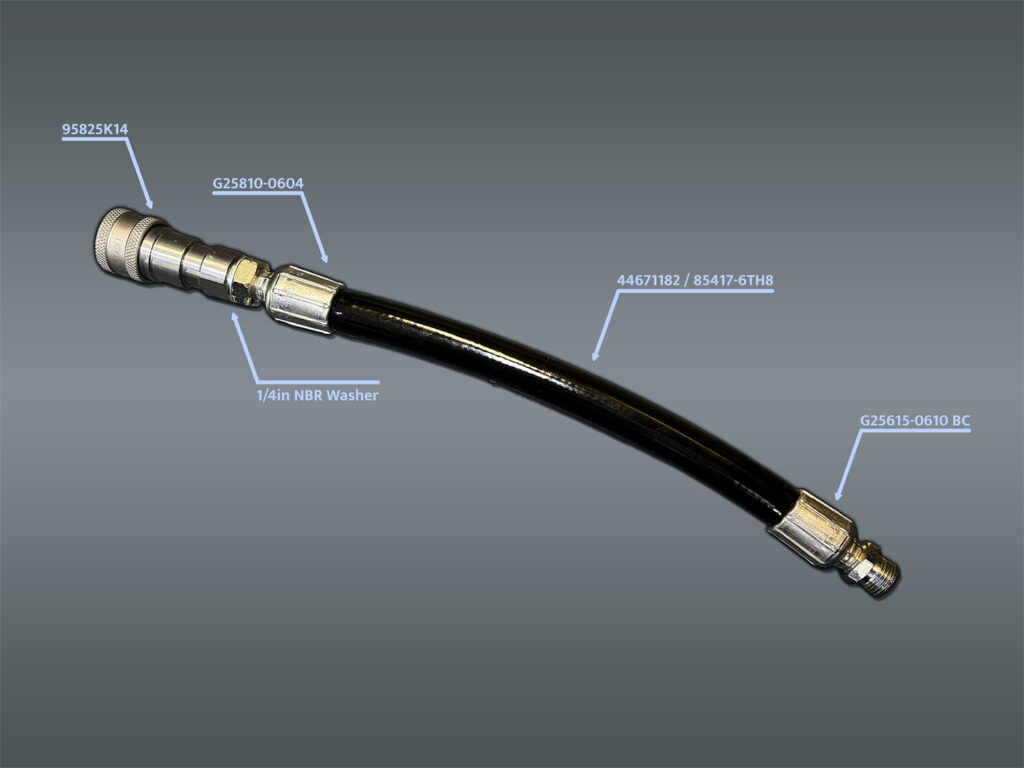
Once that’s done, you slide the nut on, then the ferrule and then screw on your hose fitting. This is where you need to decide what hose and fittings you will use. We suggest sticking with the same manufacturer. We decided to go with Gates hoses and fittings.
| Part | Manufacturer | Use | Threads |
| 710014865 / G25615-0610 BC | Gates | Hose Fitting | M16x1.5 |
There are many videos that describe the procedure to get the ferrule so refer to them or read the short version below.
– Insert nut over hard line.
– Insert ferrule of hard line.
– Insert hard line into fitting all the way.
– Lubricate (WD40 is fine).
– Hand tighten nut and fitting.
– Turn 1.25 to 1.5 turns.
– Check that the ferrule does not move along the line anymore. Spin on the line is fine.
The Hose
You can use a variety of hoses from Gates but we suggest going with a thermoplastic hose that bends easier than your steel mesh hose. This will make connecting/disconnecting the hose much easier. Thermoplastic hoses are also more durable to exposure to the elements and work at 4000 PSI (no issue for ABC’s 3000 PSI max.). The hose we went with is a TH8 (85417-6TH8). You will need 9.75-10in of hose for each rear strut line.
Crimping the Hose
The easiest way is to take it somewhere and get it crimped. If you plan on making many different hoses, investing in a hydraulic hose crimper is advisable. The crimping specs for the fitting and this specific hose are: OD – 22.35mm +- 0.25. Tail – 0mm.
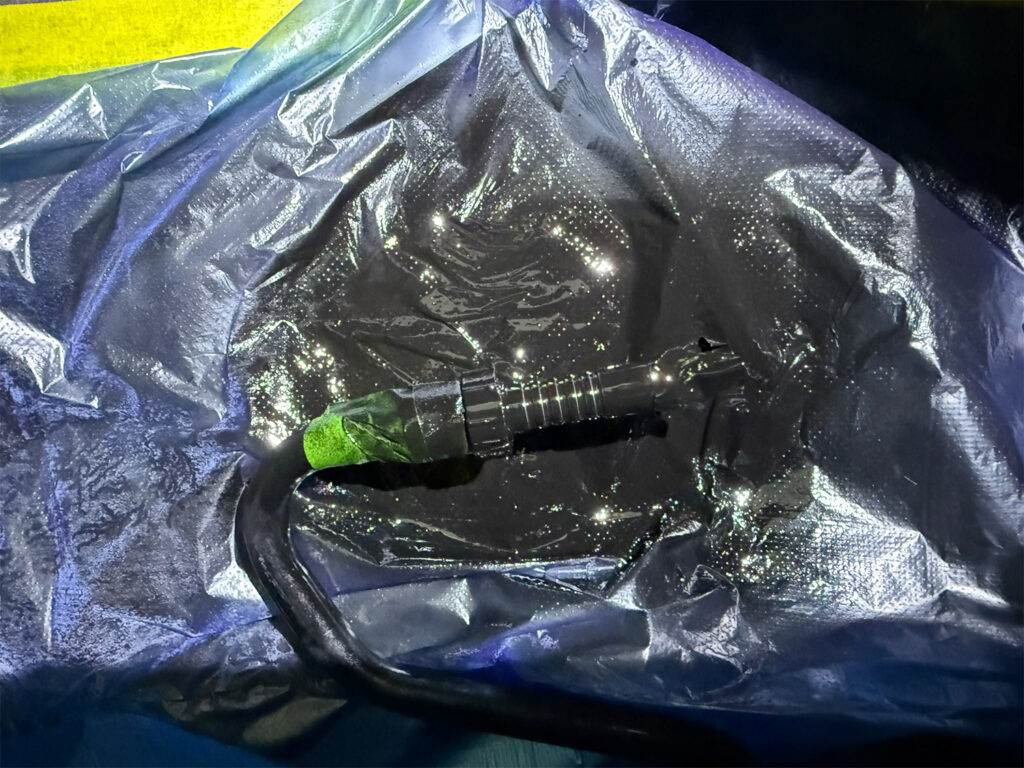
The Quick Connect Hose End
You will need a different fitting for the hose that will attach to the quick connect female piece, as well as a washer. This fitting is G25810-0604, also from Gates, as well as a 1/4in NBR Metal Bonded washer (from any manufacturer).
The Quick Connect Fittings
This is where things get a little more complicated. There are many quick connects available and we need to pick a good one that works with the rest of our parts. There are many standards out there and many opinions on each. In the end we decided to go with one that has tapered threads in addition to a washer to minimize any possible leaks (BSPP).
| Part | Manufacturer | Use | Threads |
| 95825K14 | McMaster-Carr | Quick Connect | 1/4 BSPP Female |
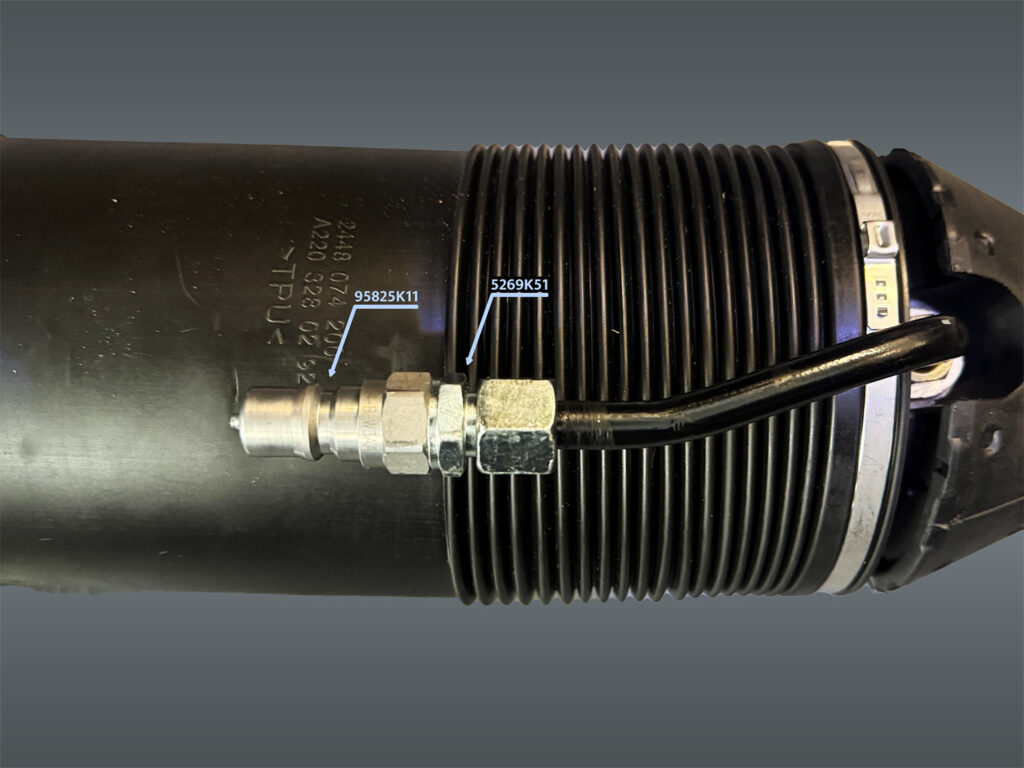
| 95825K11 | McMaster-Carr | Quick Connect | 1/4 BSPP Male |
The Strut
Each ABC strut has a hard line that is screwed in at the top, with a flared fitting. An easy way to replace the existing connection is to remove the line from the strut (17mm specialty wrench usually for injectors), cut the end off with a tube cutter and attach a flareless fitting, just like we did on the car-side hard line. A word of warning here. After you cut the line, remove the paint – the ferrule may not bite correctly and the nut may not fit. The easiest way is to burn it off and then use a gentle scotch Brite pad to sand it off. Avoid any scratches on the hard line, as they may lead to leaks. Once done, follow the same procedure as before to attach the following parts.
| Part | Manufacturer | Use | Threads |
| 5269K51 | McMaster-Carr | Compression Fitting | 10mm, 1/4 BSPP Male |
Note that the compression fitting above already comes with a nut and ferrule. Alternatively you can use the same parts that were used on the car-side hard line.
Reassemble everything and make sure everything is tight. Keep in mind that the stock torque values for the flared fittings is 50Nm so don’t go crazy. All these fittings can be overtightened, which will damage them and lead to leaks.
Result?
Absolutely. We have made the rear strut hose completely removable and replaceable for the cost of 10in of hose and 2 crimp fittings. This means that if anything goes wrong with this section of the line in the future, replacement will be easy. It will also help with completely removing the entire line from the car to replace the middle hose section without dropping the subframe. The strategy for that would be the same.
To recap, our new line has brand new ISO quick connect fittings which stop the fluid loss on both sides when disconnected. Additionally, the hose section can be removed independently on both ends, and all parts can be replaced independently without having to remove the entire line from the car. You can’t get more flexible than that.
Now that you have a handle on the necessary parts and procedures, you can replace many other hoses and bypass some of the crazy Mercedes requirements to do so. Lift the engine? Drop the subframe? Let’s hope not.