This one will also bother the Mercedes purists out there. So, if you’re offended by new tech in older cars, or even better, great smells, this project is not for you. However, if you think older cars are great and they should smell like new cars and have great tech, then read on.
Strip!
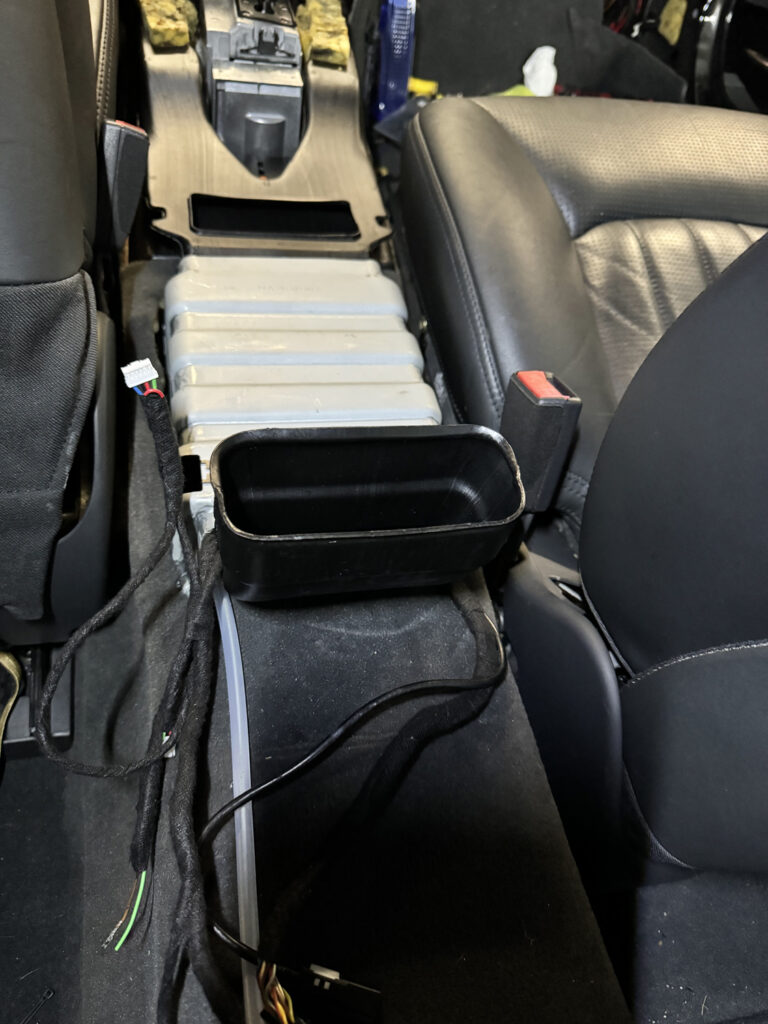
So, the plan is to install a fragrance atomizer in the center console, along with a modernized phone magnetic charger, replacing the antique Motorola phone cradle. Seeing how we are going to be running a lot of new wiring and hoses, it’s best to remove the center console from the car. This generally snowballs into removing many other parts, at least on Mercedes vehicles. The W215 is no exception, so the COMAND system must come out along with a variety of other trim pieces.
The Lid Situation
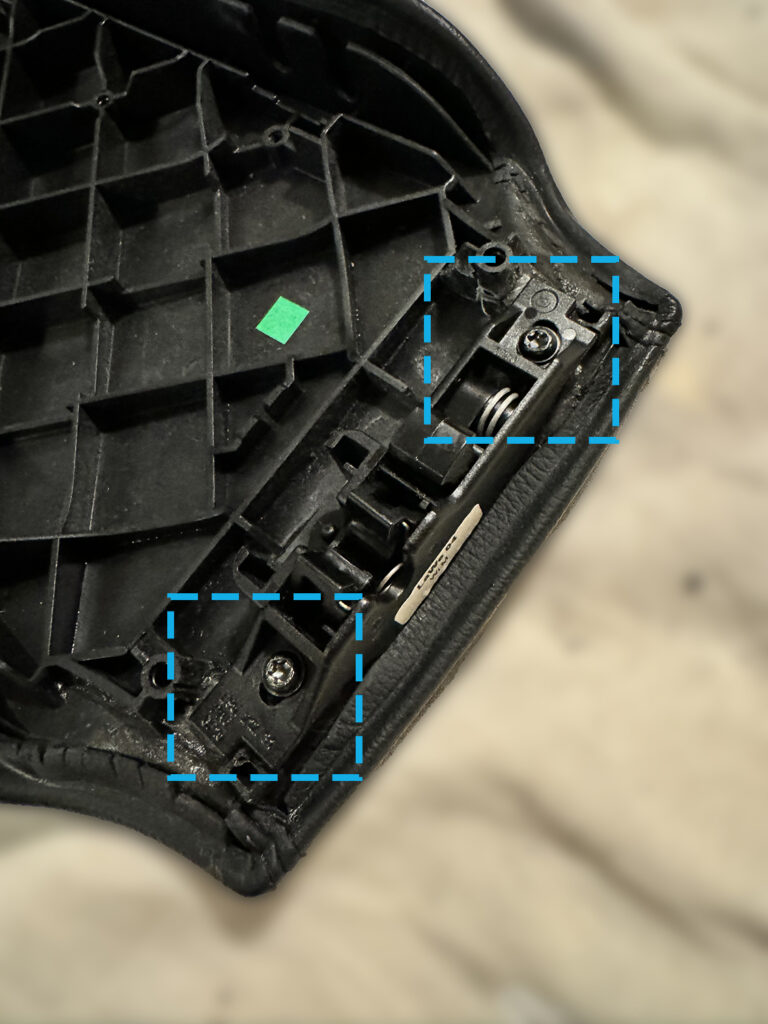
The center console cover/lid is generally a problem, especially on older Mercedes vehicles. Sometimes repairs are necessary. In order to make said repairs, the lid must generally be taken apart. Sometimes this is impossible, as they may be glued/plastic welded together and cannot be disassembled without damage. In this case, the lid comes apart too easily. A couple more screws would’ve made this thing a lot sturdier.
Our locking mechanism supports were completely crumbled. We decided to design, and 3D print some new ones. A lot of glue and sanding later, everything is fixed.

Charging Wirelessly
The next logical step was to upgrade the existing phone cradle, or better said, remove it and put it in a museum. We decided to replace it with a wireless charger that neatly keeps your phone away while it’s connected to the head unit via Bluetooth.
After removing the existing cradle, we modified and glued the mount in a way that allows the charger to be screwed in from the top, without the need to disassemble the lid, should we decide to replace it further down the road.
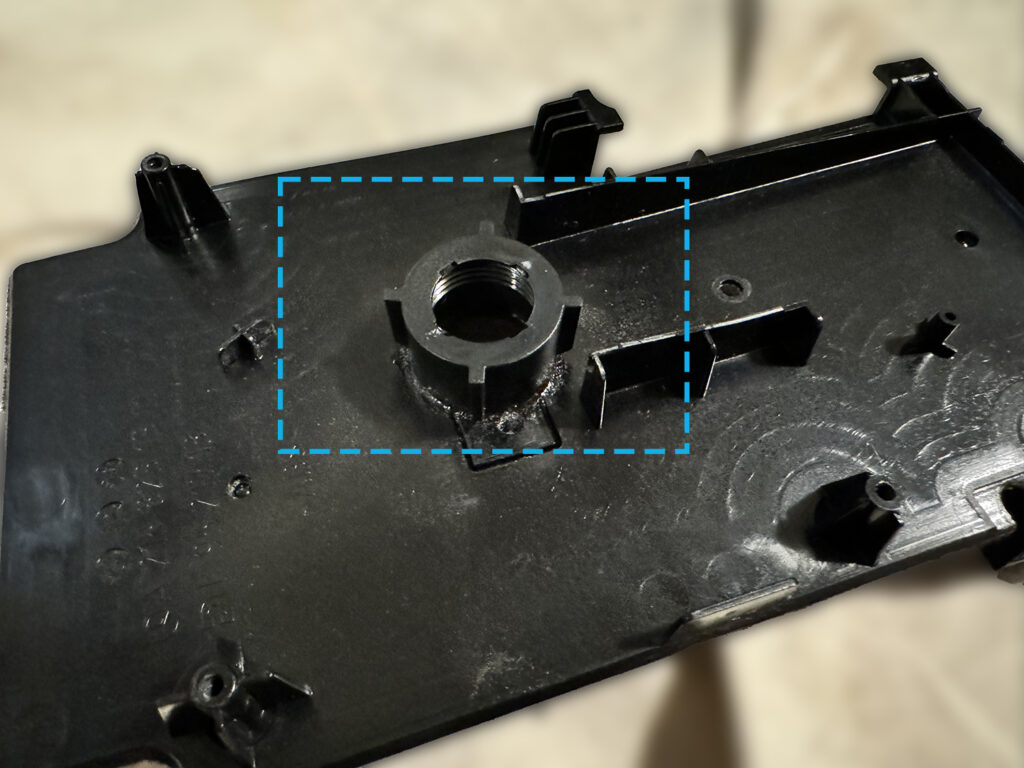
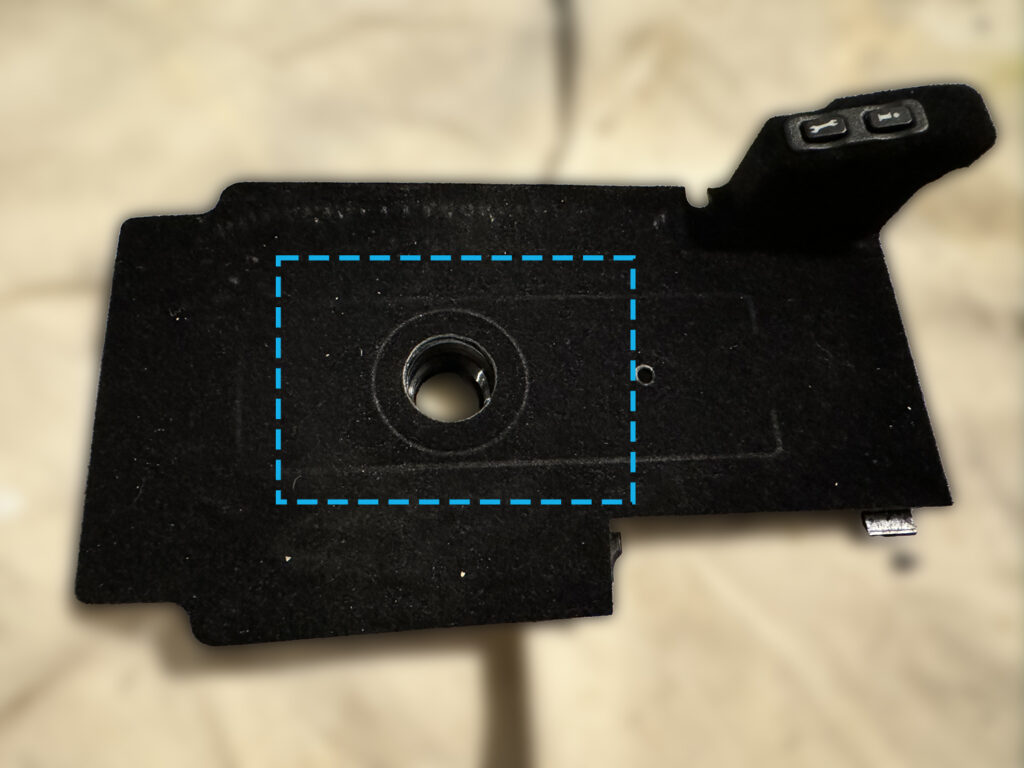
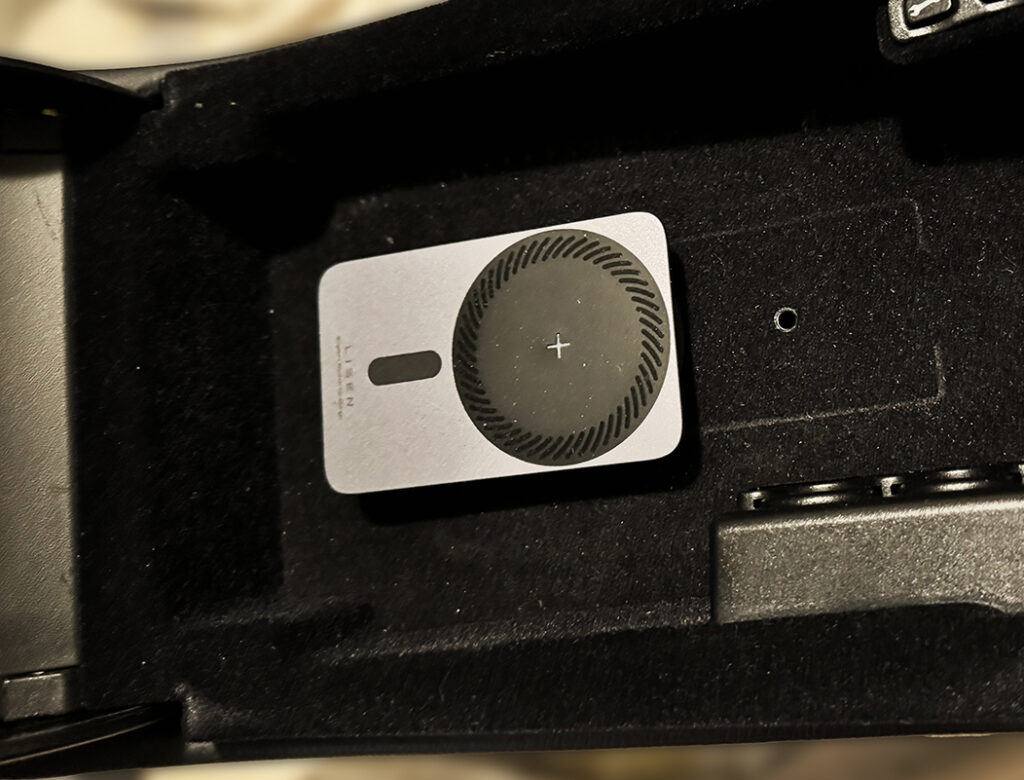
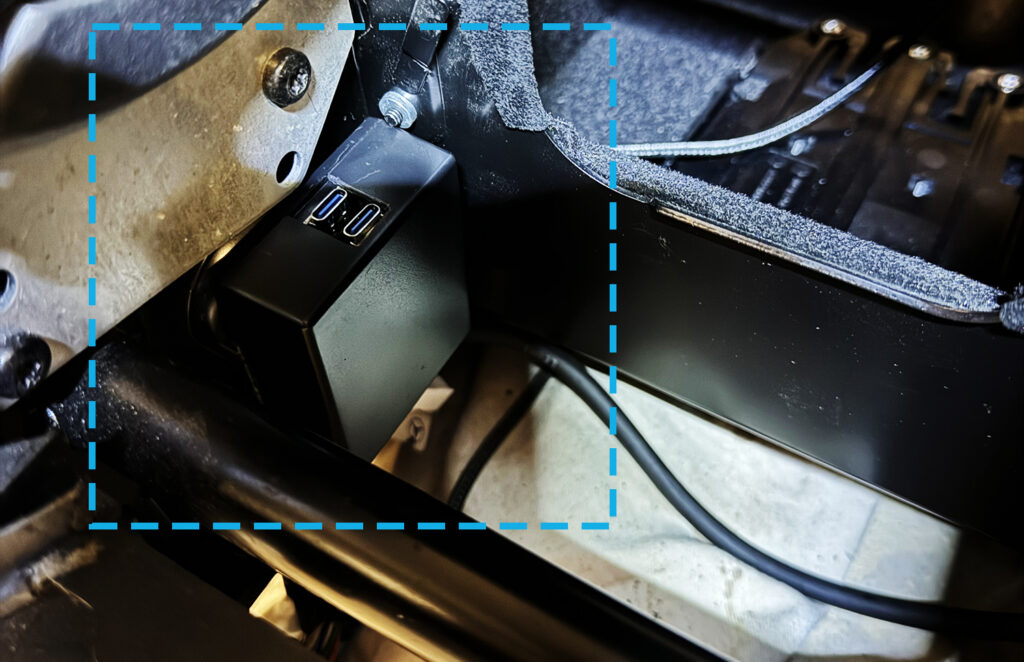
Once the lid was reinstalled, we decided to run wiring through existing locations, making sure the opening and closing of the lid would not create an issues. We installed the actual charger close to the lid of the console, pictured below.
Atomizing
Installing an atomizer is surprisingly time consuming and complicated. There are several products out there that are much easier to install than the OEM Mercedes atomizer, but they honestly feel half-baked and gimmicky. So, we did the legwork and got the atomizer installed in our W216. Building on that experience, we decided to install one in the W215 as well. It would sit in the center console, be controlled by our ModuleSettings device which in turn would be controlled by our app via the Android head unit.
This would mean installing an additional fuse box, seeing how this is not the only device we would be adding. Once the fuse box was done, we got to modifying the center air vents to include nozzles for our freshness dispenser.
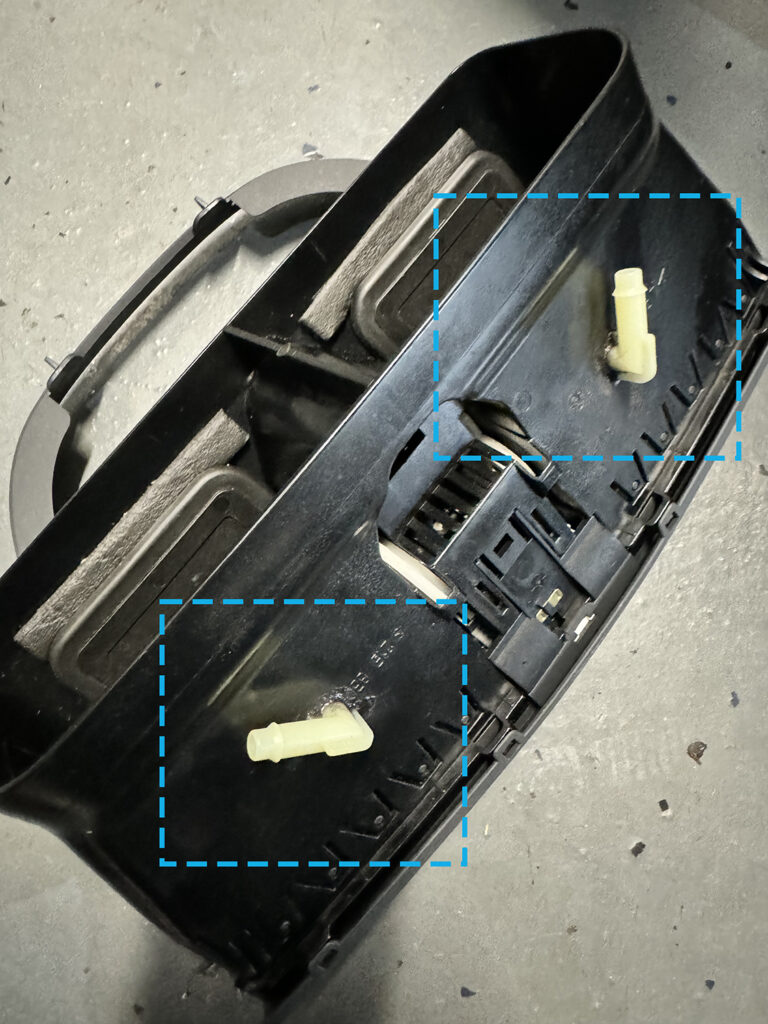
These nozzles then combine into a single hose that will in turn lead to the atomizer. Of course, assembly/disassembly must always be kept in mind. We strategically installed connectors at specific points in the hose, to make take everything apart later down the road easy, making sure we do not have to remove the entire center console to access the hose or wiring (who knew this was possible!).
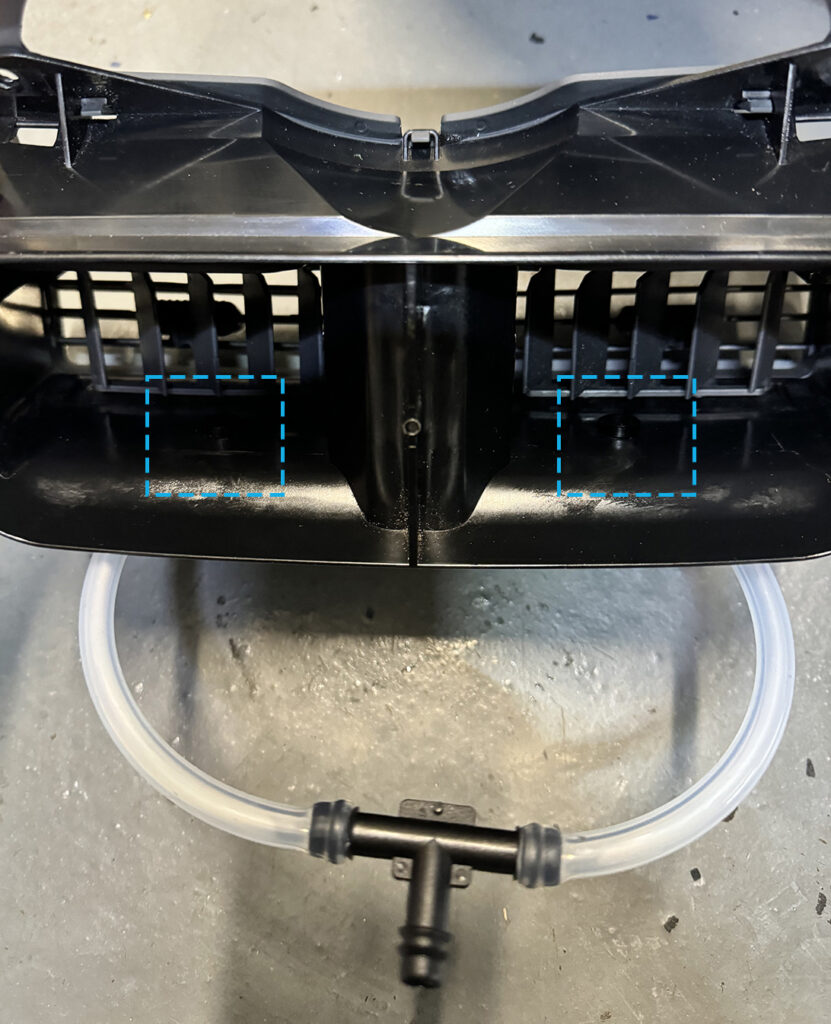
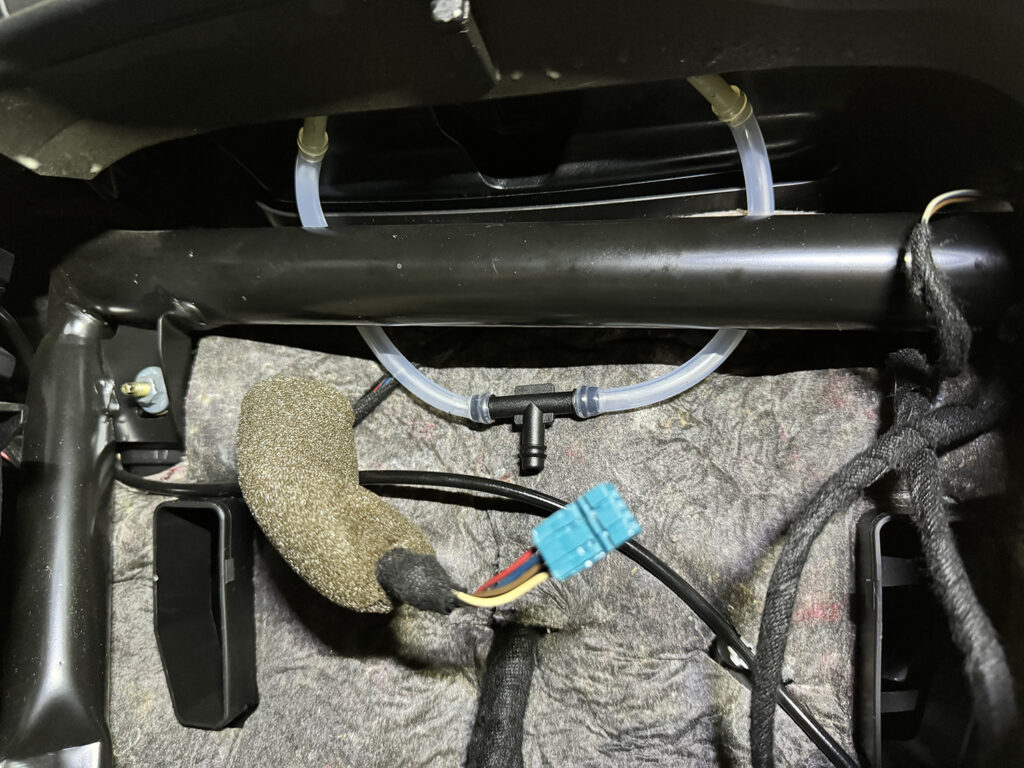
The rest of the hose runs through stock wiring locations, as they have plastic covers, protecting the hose from getting squashed/closed by the various trim pieces. We also picked a hose that’s thick and doesn’t compress easily, and is resistant to oil/fluids.
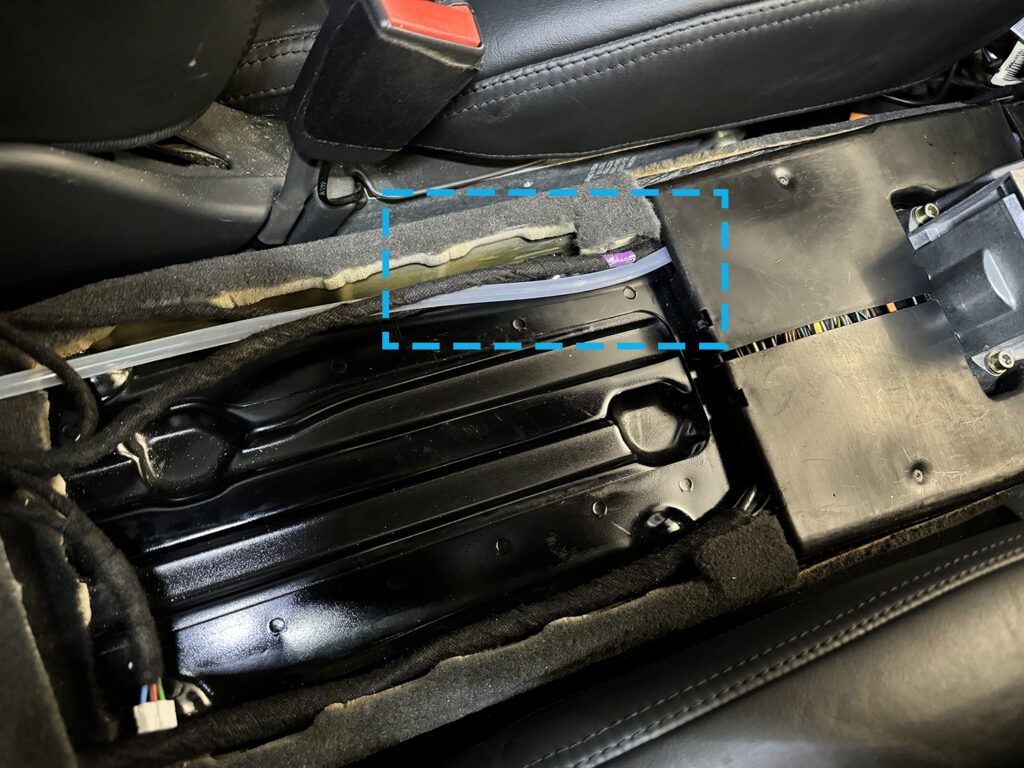
Once the center console vent is reinstalled, we turned our attention to installing the actual atomizer. This presented several challenges.
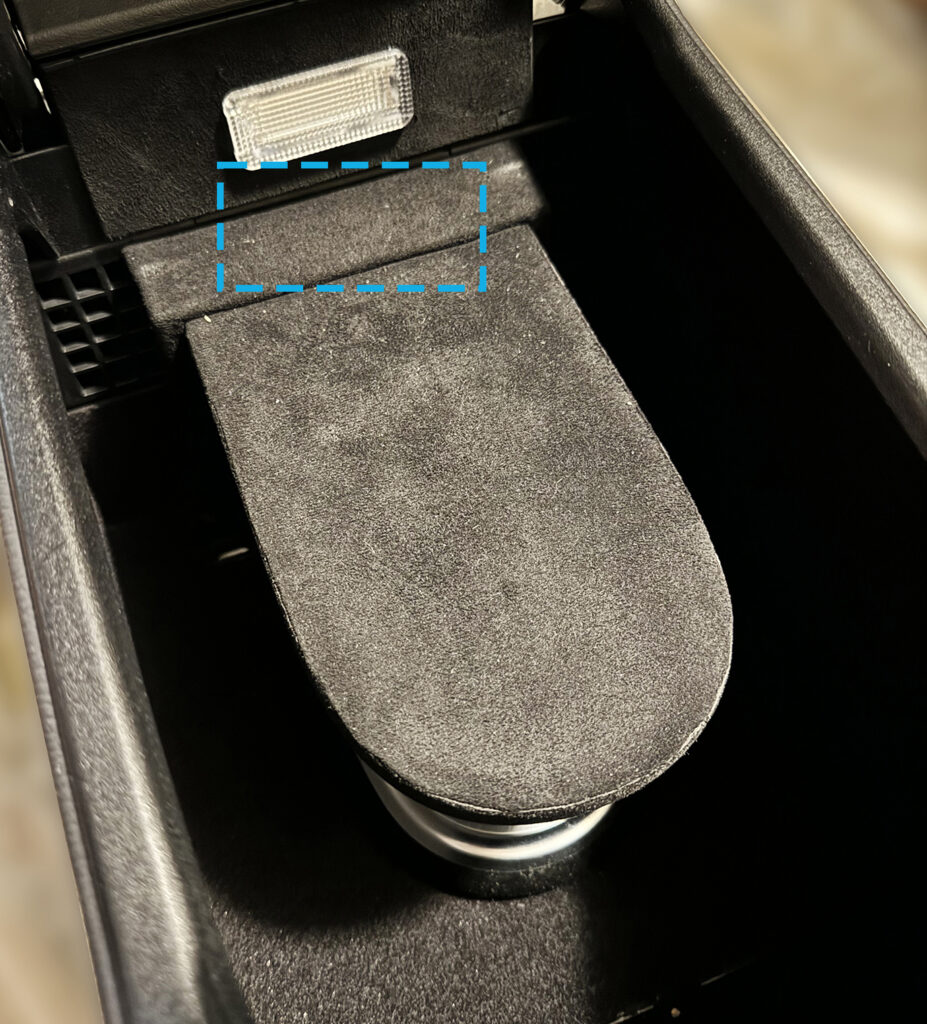
The first issue was that console is not as deep as the W216, which required trimming the plastic on top of the atomizer and reskinning it with some Alcantara like fabric.
The second challenge was that the atomizer would be covering the console light, which required us to relocate it. This was easier said than done, as space was at a premium, but we managed to get it done.
The third issue was that the atomizer connector needed to be rotated 90 degrees, which required disassembling the unit.
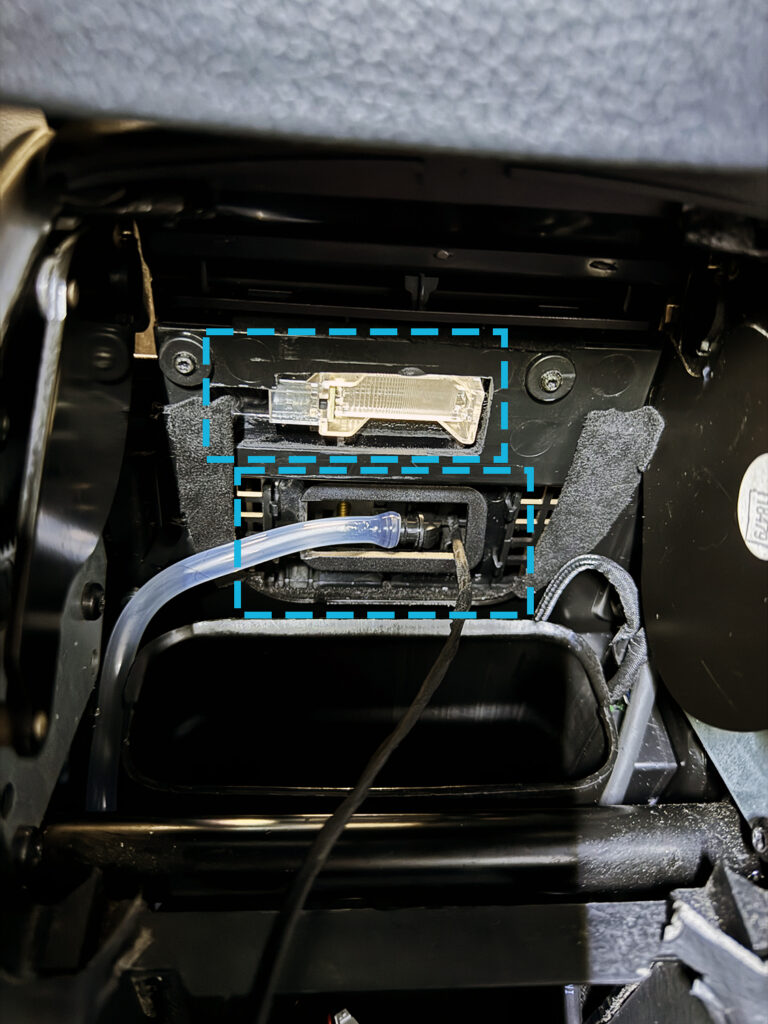
Lastly, the console lid does not have a switch that activates the console light, making this an issue with the atomizer, which requires an input when the lid is open, to release the fragrance bottle. So, clearly, we decided to add our own switch. We sourced one from a W222 glove box and modified it to fit in our W215 lid. We also 3D printed an extension for the plunger that activates the switch, to make sure everything works well. Thankfully we had not removed the existing phone wiring, in case we needed it later, so we just repurposed some of it to accommodate the new switch.
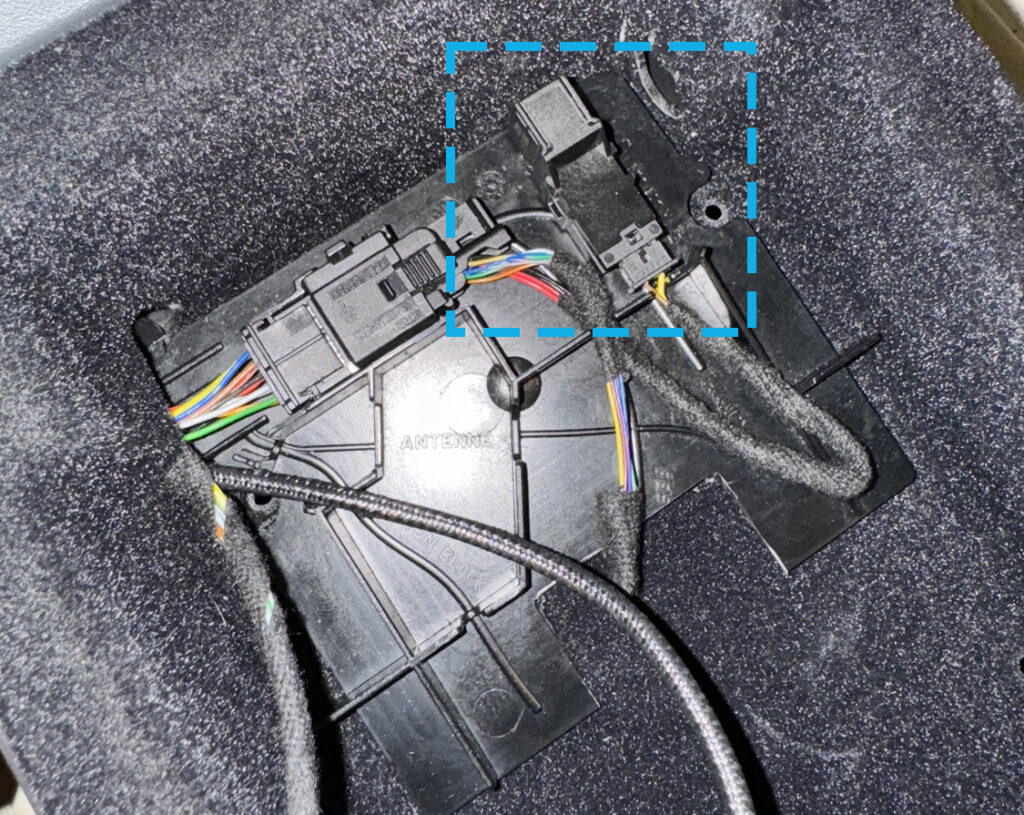
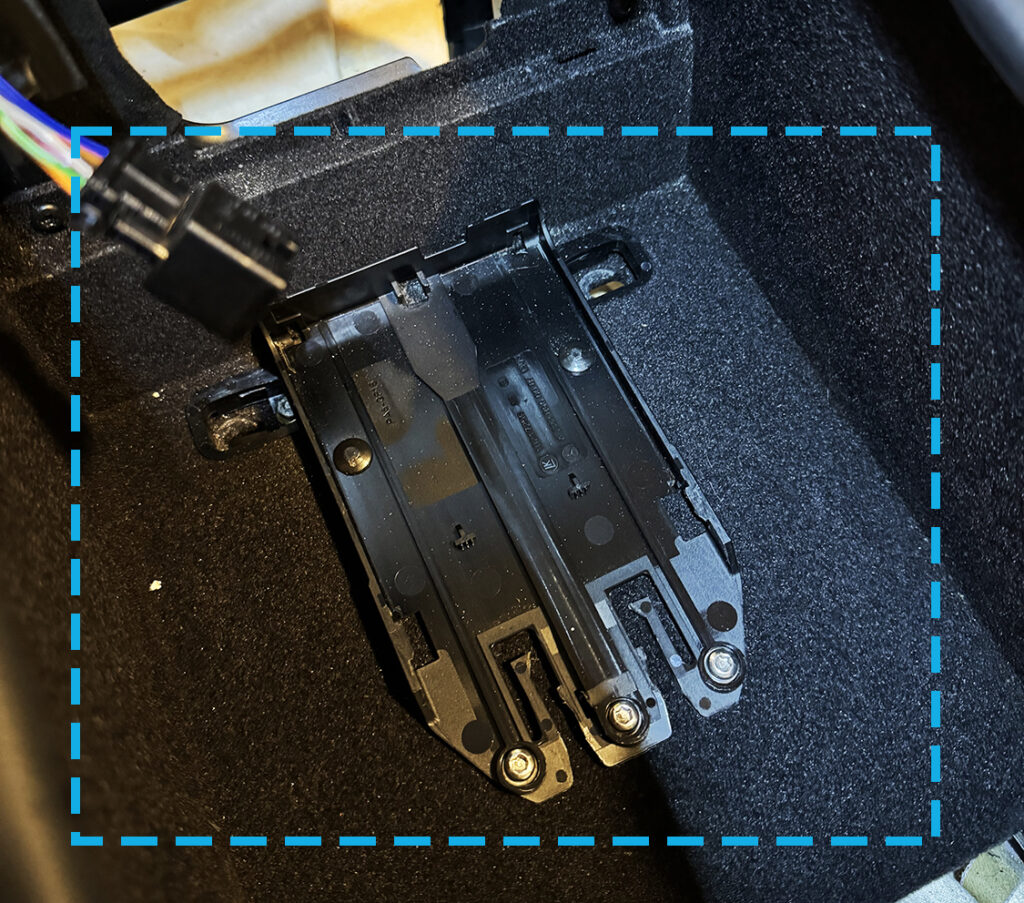
Next, we installed the atomizer mounting sled. This also presented issues, as it required trimming the bottom of the center console, to make room for the mounting screws. It was also a tight fit between the screws that secure the center console to the car.
Bring it Home
Finally, we are ready to install the atomizer. Not so fast! We still have to design and 3D print a piece of trim for the back of the atomizer. The console is angled in the back and the atomizer is straight. We wrapped that along with the new console lamp trim in Alcantara like material and…result!
Q&A
What’s Part 2?
Part 2 is when we install the ModuleSettings device and get the atomizer up and running.
Can you just connect the atomizer to power and it works?
No, it needs to be controlled by an MCU via a data connection.
What’s this ModuleSettings thing?
It’s a proprietary ACM device developed to control a variety of devices in combination with our Android app. So, it installs anywhere, connects to your head unit via Bluetooth and then allows you to set startup and power preferences for aftermarket devices as well as Parktronic/ESP etc., in addition to controlling the atomizer, allowing you to raise/lower the car, etc. It makes everything integrated, instead of having random switches everywhere for your new toys.
Why do you need a fuse box to install an atomizer?
You don’t. But…what if you are planning to install multiple other devices? Do you install a fuse tap for each of them or run them off the same wire? Current consumption is a real consideration if you don’t want your car to burn to the ground.
Why can’t you install it in the glove box? Wouldn’t that be easier?
Yes it would be. It doesn’t fit.
Why can’t you install it in the rear center arm rest thing?
That swings up and down and the atomizer needs to be horizontal to work. Also, it doesn’t fit.
Why do you need a switch in the console lid to install an atomizer?
Because the atomizer releases the fragrance bottle when the lid is open. Sure, we could integrate that into our app, but that’s just extra steps that can get annoying.
Why can’t you just put a tree on your mirror like everyone else?
Because they smell bad, and they last 34 minutes. This provides a constant smell that makes your car experience much better.


