

The problem with modern vehicle multimedia systems is that they are well built and integrated for the time period when are made. The issue comes in 2 years later when the tech starts looking like 1980’s tech. Sure, the manufacturers could simply adopt Android standards and let everyone upgrade their head units on a yearly basis, much like a phone. That, however, would be too simple. Why replace the head unit when you can replace the entire car?
Thankfully, many vehicles have third party Android options at this point, that, mostly, work a lot better than the system they are replacing…with a few tweaks here and there. Hey, it’s Android after all. The only problem that we see with these systems is controls, which are all over the place. Most car systems were designed with a rotary control in mind, which doesn’t really translate to Android very well. More modern systems are a hybrid that offer a rotary control in addition to a touchpad/mouse like device. What if we could fully integrate one of these with Android, in addition to integrating it with an older vehicle? We’d have the perfect setup most likely…And to take it a step further, we could integrate it with a third party HUD (head up display) as well. We’re getting a little ahead of ourselves. First things first.
Will it Fit?
Physical dimensions are important when tackling any new project so it’s best to check fitment before investing any time or energy into the unknown.
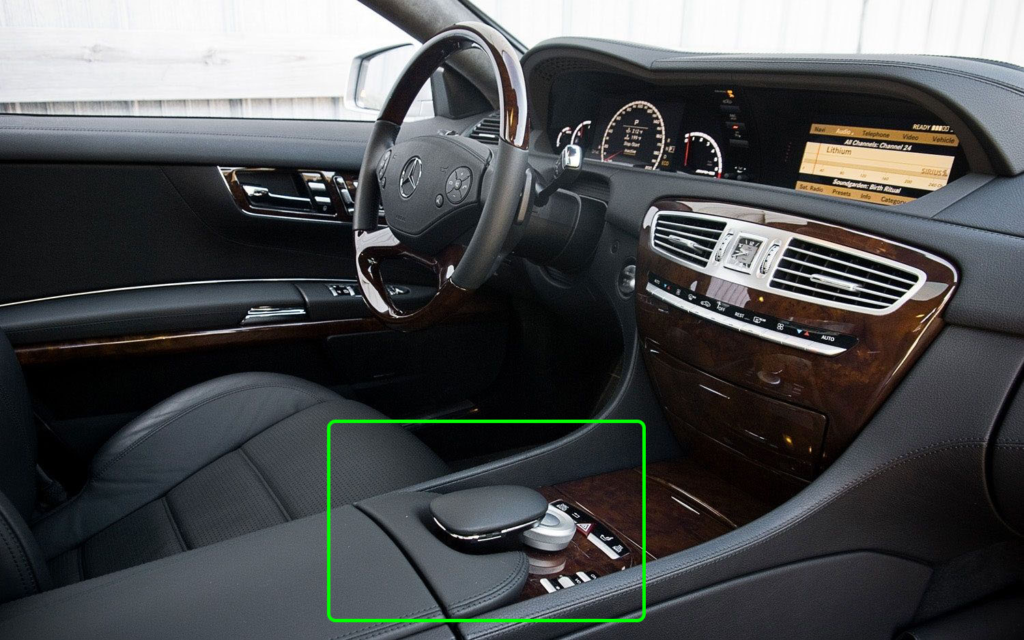
Thankfully Mercedes uses iterative designs mostly, so things should be pretty close. Here’s what we are dealing with stock. A rotary controller with a palm rest that doubles as a keypad to dial a number…Good back in the day but mostly useless now.
Here’s where the Mercedes iterative design comes in. This next setup is 2 generations newer. The palm rest/keypad is now a touchpad. Smart eh? We think so.
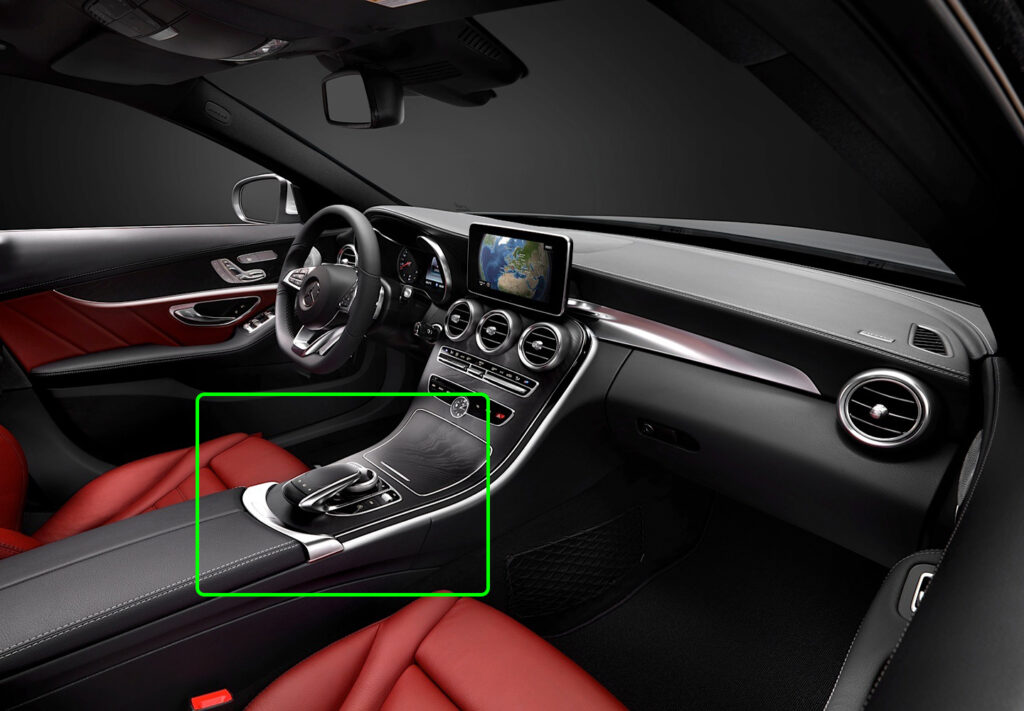
Mercedes used this setup in a lot of cars, including the W205 pictured above. There are slight variations to it, but it’s all modular and all the components are the same. Could we get this to fit?
How it’s Made
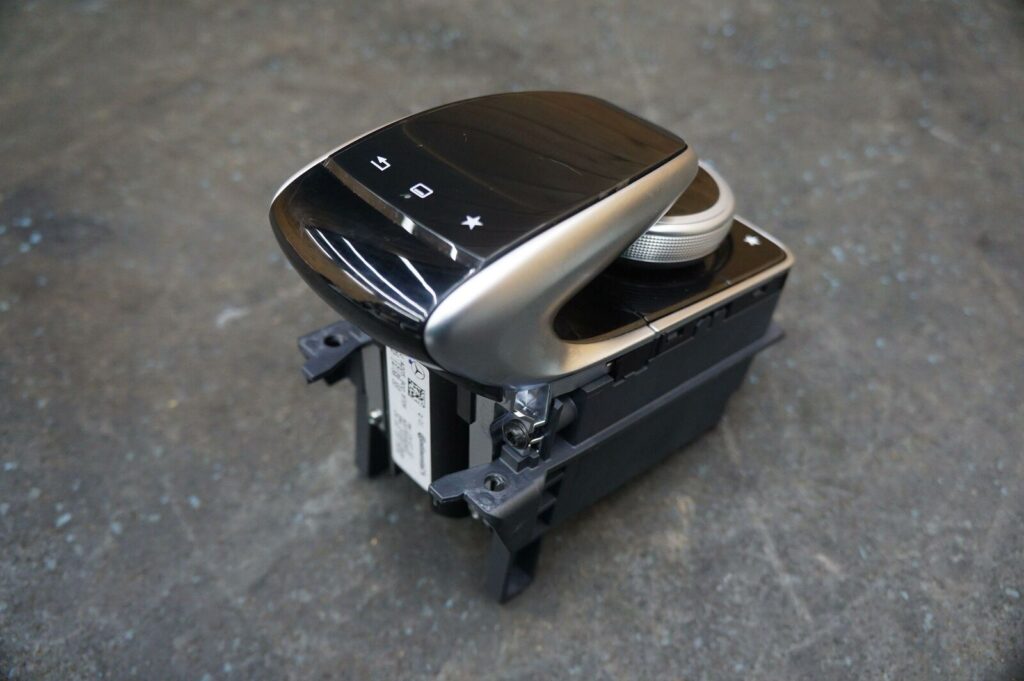
The new component is modular and it comes in a couple of options. We are interested in a C190 version, that excludes all the additional buttons. We just need the touchpad and the rotary control and all related trim.
Now that the parts are sourced, it’s time to disassemble everything, including the stock setup. Oh, as a little side project wouldn’t it be nice if we could add some sort of LED lighting to the rotary control? We think it would be pretty cool. So let’s see if we can get the 3D design going first.
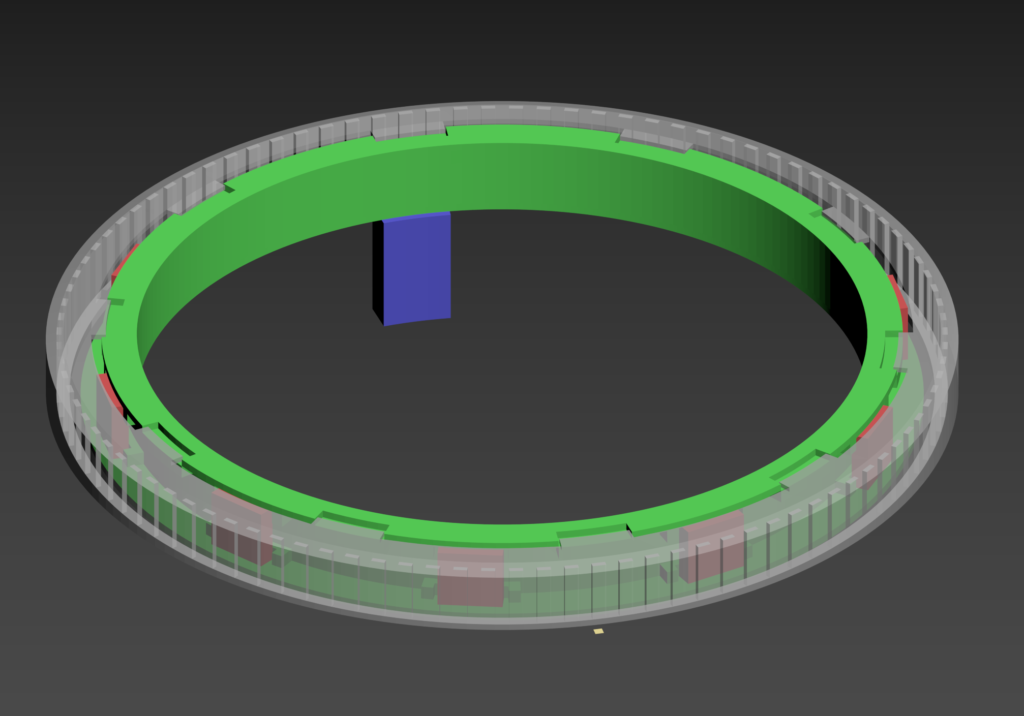
Unfortunately we have very little room to work with and some additional mods may be necessary to make this fit. We will also have to use 3535 LEDs which are rather small to solder by hand, especially at 6 wires per LED. Let’s see what happens if we try to 3D print this.
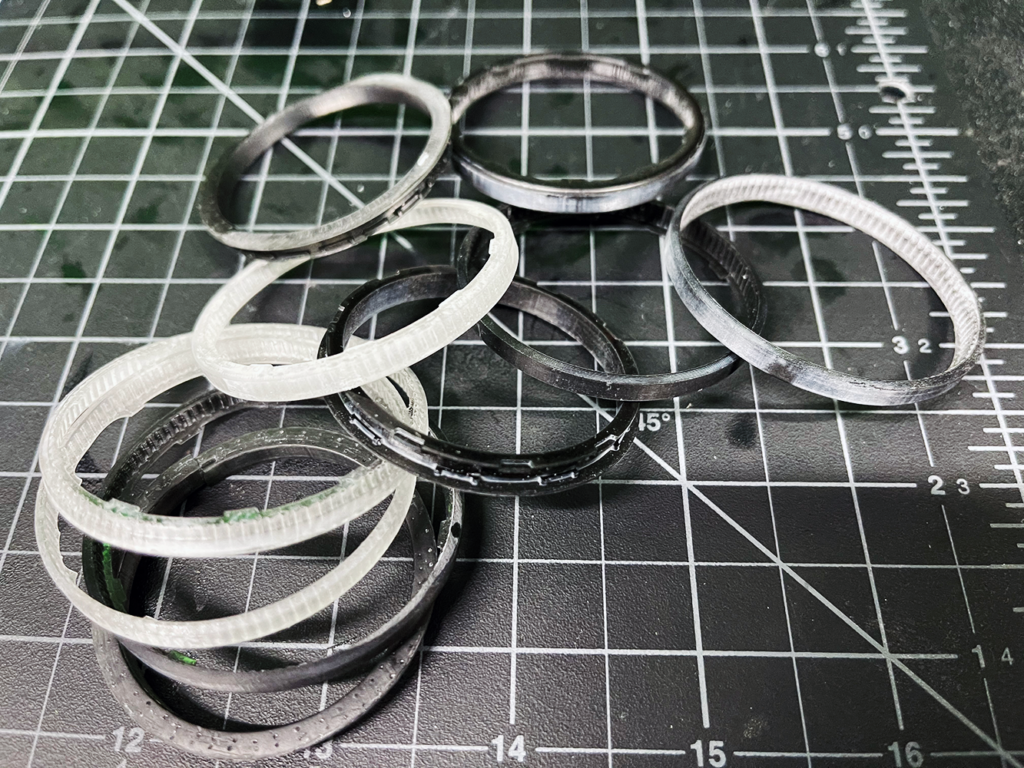
A “few” quick prototypes later, we have a working design. When it comes to 3D printing, everything is an adventure, especially when working with 2 different materials. We needed a clear piece and a base, black piece. As you probably guessed, these materials print and shrink differently, making the end result different from the nice, tightly fitting parts you see on your screen when designing said parts.
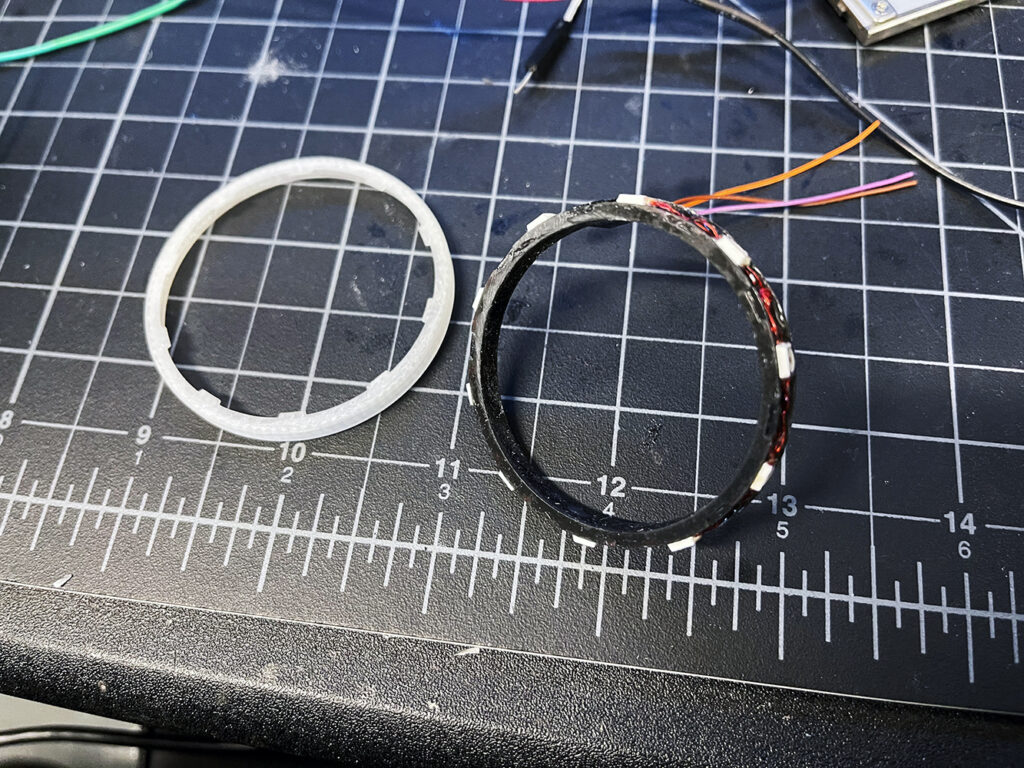
Yes, soldering the 10 LEDs is another adventure, one we are glad is over. The finish is rough as pictured, as the parts were ready for paint.
Next we have to figure out how to mount a capacitor that will provide some protection to our LEDs. Putting everything on a board and making room for it inside the OEM case seems to be the clean way to do it.
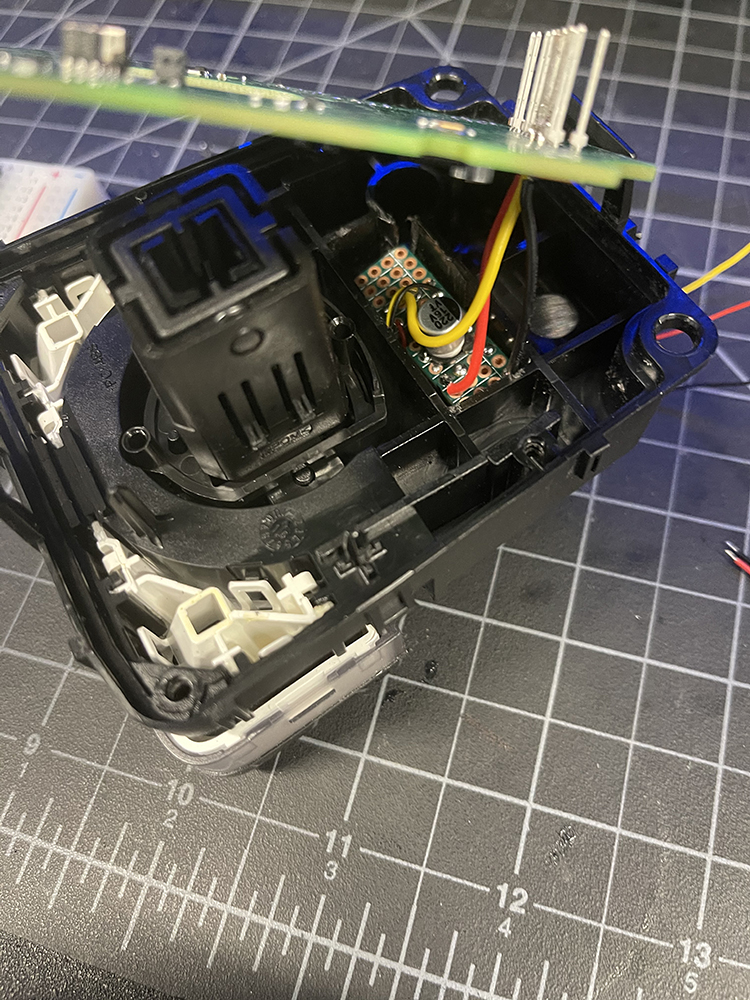
We also need to figure out how the wiring for the LEDs will enter the unit. Quick look at the wiring diagrams reveals our unit has quite a few pins that are not used. Let’s move them to some empty slots on the board and repurpose them for LED signals. This means that our LED wiring can simply tag along on the OEM connector. Clean and simple.
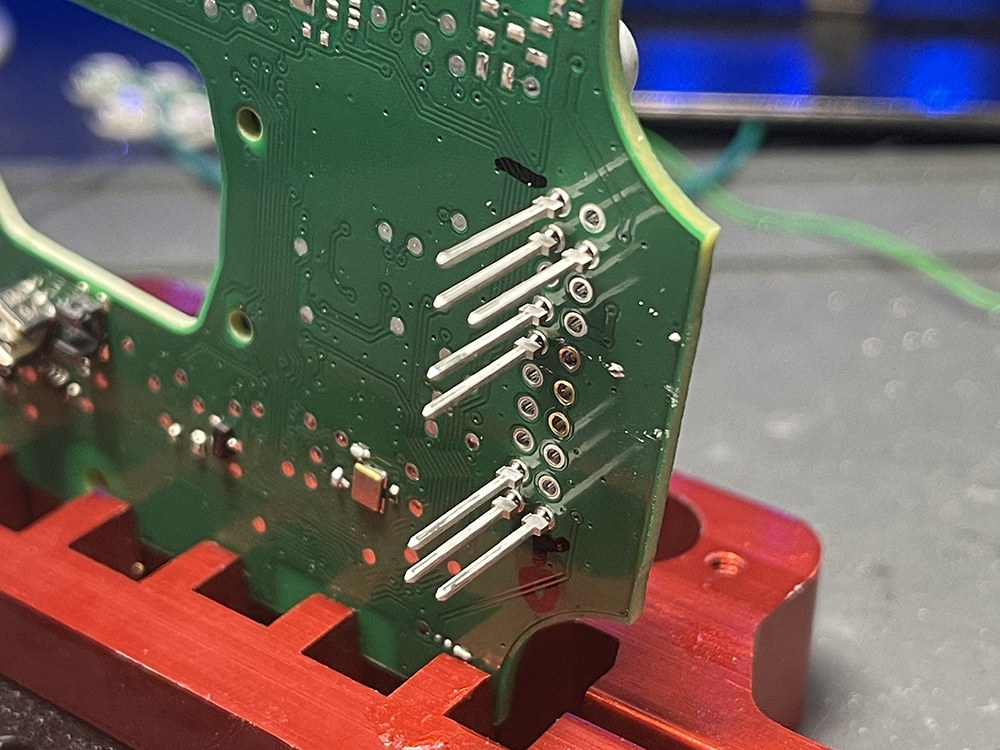
So, the extremely thin and fragile wiring from the LED ring goes to the board. Sturdier wiring goes from the board to the pins. Easy to disassemble and super clean from the outside. Now let’s put everything back together and see where we are.
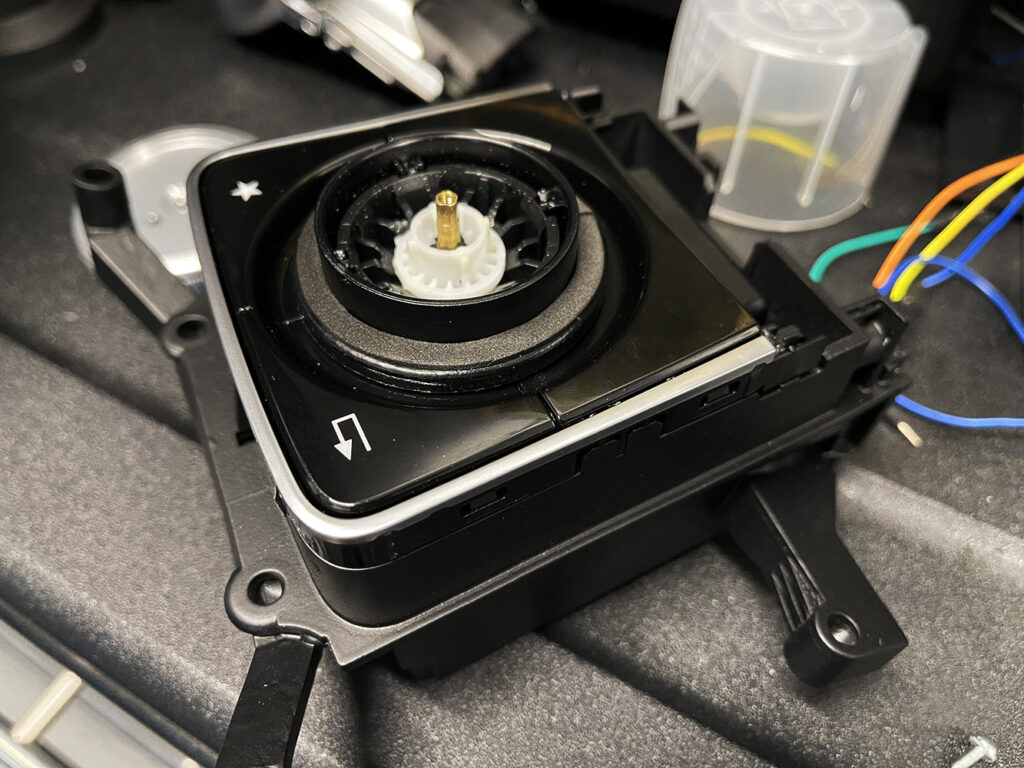
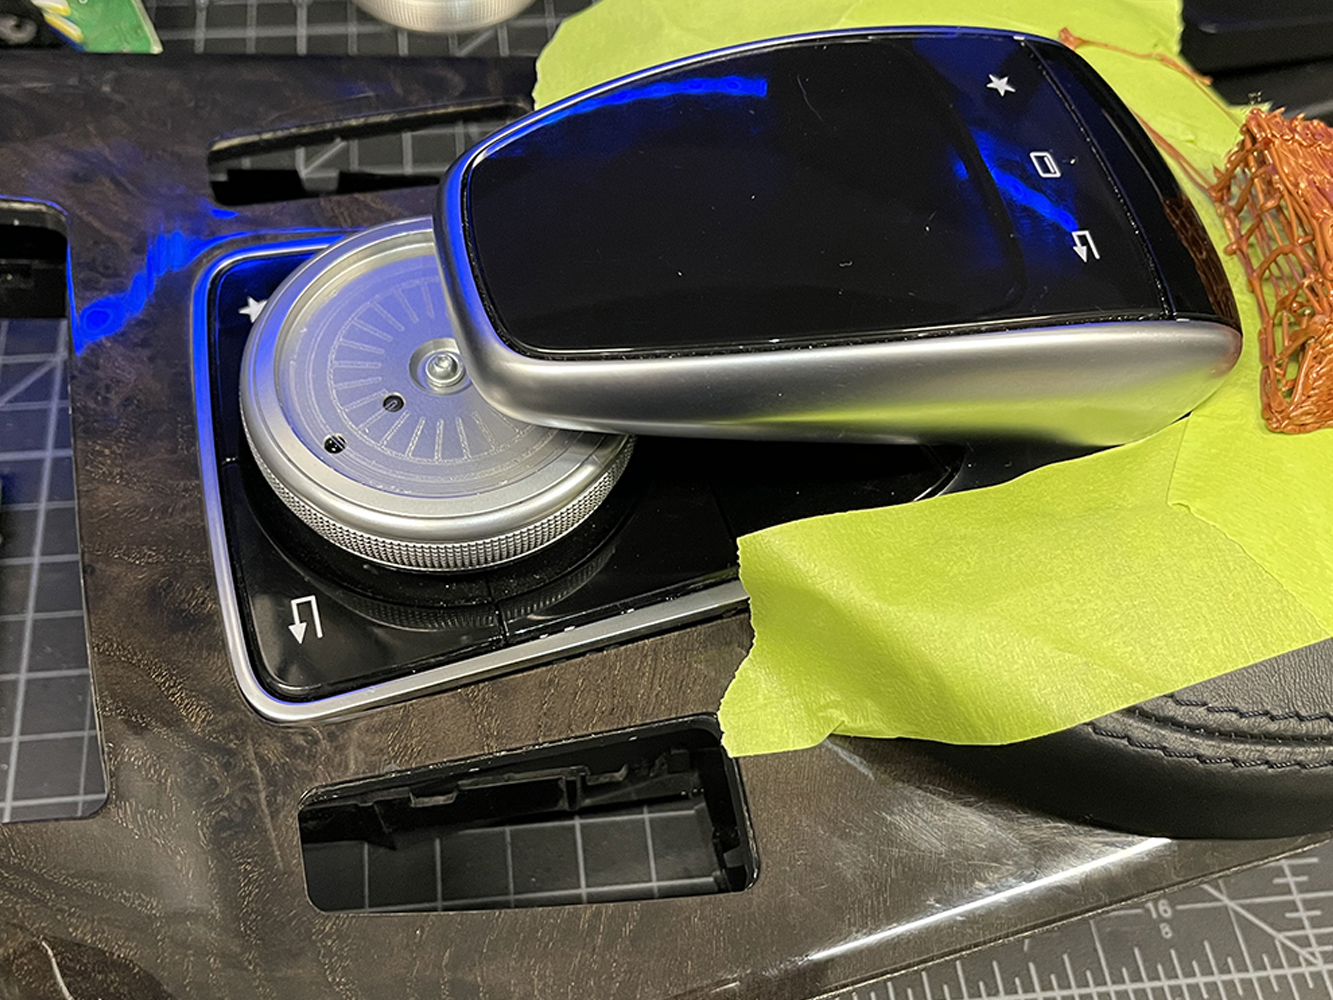
That looks a lot better. The ring is black when off and transparent so the LEDs can shine through. The foam padding on top is to soften up the major shudder that is sent through the entire vehicle when you push down the rotary knob. So unnecessary. Speaking of the knob, shaving about 3mm of the bottom of it was necessary. Otherwise there would be no room, unless we used even smaller LEDs.
If you look closely you’ll see the 3D printed brackets we designed and mounted to the rotary controller case. These will come in handy when we mount everything together, later. How were the designed? 3D pen and printing a few prototypes. 3D pens have come in handy a few times on this project.
Next we have to address the elephant in the room. Will this fit in the nice wood/aluminum trim? Clearly we’ll have to cut it. How will we even get an outline of this contraption for some clean cuts? The answer is yes, it will fit and the outlines are easily handled by a 3D pen…again. Lots of careful sanding and trimming and we have a super clean, stock looking piece.

In part 2 we will take a look at finalizing the physical aspects of the installation as well as decide what we will do with the stock COMAND control/knob unit.


